Ride Tech systems are popular among car enthusiasts. They want to improve their vehicle’s suspension. However, like any advanced technology, they can encounter issues that require troubleshooting. This article will explore common problems with Ride Tech air suspensions. It will offer tips to ensure they work at their best.
Understanding Ride Tech Systems
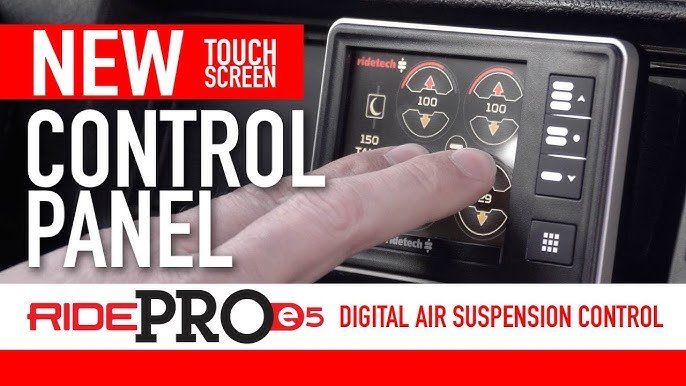
Ride Tech focuses on air suspension systems that offer adjustable height and better handling. Products like the RidePro and E5 systems let users tune their vehicle’s suspension for different driving conditions.
Common Issues with Ride Tech Systems
Despite their advantages, users may face several common issues with Ride Tech systems. Understanding these problems is the first step toward effective troubleshooting.
1. Inconsistent Ride Height
One of the most frustrating issues users encounter is inconsistent ride height. This can result from improper calibration or fluctuations in air pressure. To resolve this, ensure the system is calibrated correctly and check for leaks in the air lines.
2. Air Leaks
Air leaks are a frequent concern with air suspension systems. They can lead to a drop in ride height and affect overall performance. Regularly inspect fittings and hoses for signs of wear or damage, using soapy water to identify leaks.
3. Compressor Malfunctions
If the compressor fails to activate or build pressure, it could indicate electrical issues or a blown fuse. Check the compressor’s connections and fuses, ensuring that it is properly wired to the vehicle’s battery.
4. Calibration Failures
Calibration failures can occur if there are errors during the setup process. Common error codes include ERROR 167 (Calibration Failure) and ERROR 161 (Vehicle Voltage Low). Follow the troubleshooting steps outlined in the user manual to rectify these issues.
Troubleshooting Steps
When facing issues with your Ride Tech system, follow these troubleshooting steps:
Step 1: Check Electrical Connections
Ensure all electrical connections are secure and free from corrosion. This includes checking the display harness and compressor connections.
Step 2: Inspect Air Lines and Fittings
Examine all air lines and fittings for signs of damage or leaks. Replace any damaged components immediately to prevent further issues.
Step 3: Test the Compressor
Activate the compressor manually to see if it functions correctly. If it does not turn on, check the fuse and wiring connections.
Step 4: Review Calibration Settings
Revisit your calibration settings in the system menu. If errors persist, consider resetting the system according to the manufacturer’s instructions.
Advanced Troubleshooting Techniques
For more complex issues that standard troubleshooting cannot resolve, consider these advanced techniques:
1. Software Updates
Ensure that your system’s software is up-to-date. Outdated software can cause compatibility issues and erratic behavior in your suspension system.
2. Professional Assistance
If problems persist, seek help from certified techs. They must know Ride Tech systems. They can provide insights and repairs that may not be apparent during DIY troubleshooting.
Preventative Maintenance Tips
To avoid problems with your Ride Tech system, follow these tips for maintenance:
1. Regular Inspections
Conduct regular inspections of your air suspension system to catch potential issues early. Look for signs of wear on air bags, fittings, and hoses.
2. Proper Installation
Ensure your Ride Tech system is installed correctly. Follow the manufacturer’s guidelines or hire professionals.
3. Monitor Air Pressure
Regularly check air pressure levels in your air bags to maintain optimal performance and ride quality.
Conclusion
Troubleshooting ride tech trouble shooting might seem hard initially. However, knowing common problems and their fixes makes it easier. By maintaining your system and addressing issues early, you can enjoy a smooth, adjustable ride for years.


