{ how to build your own cross stich kit } Creating your own cross stich kit can be a rewarding and enjoyable experience, allowing you to personalize your projects according to your tastes and preferences. This guide will walk you through every step of the process, from selecting materials to designing your pattern and stitching your masterpiece.
Understanding Cross Stitch
What is cross stich?
Cross stitch is a form of counted thread embroidery where X-shaped stitches are used to form a picture or design on fabric. It is a popular craft due to its simplicity and versatility.
Benefits of Making Your Own Kit
- Customization: You can create designs that resonate with you personally.
- Cost-Effective: Building your own kit can often be cheaper than buying pre-made ones.
- Learning Experience: Designing and assembling your kit enhances your crafting skills.
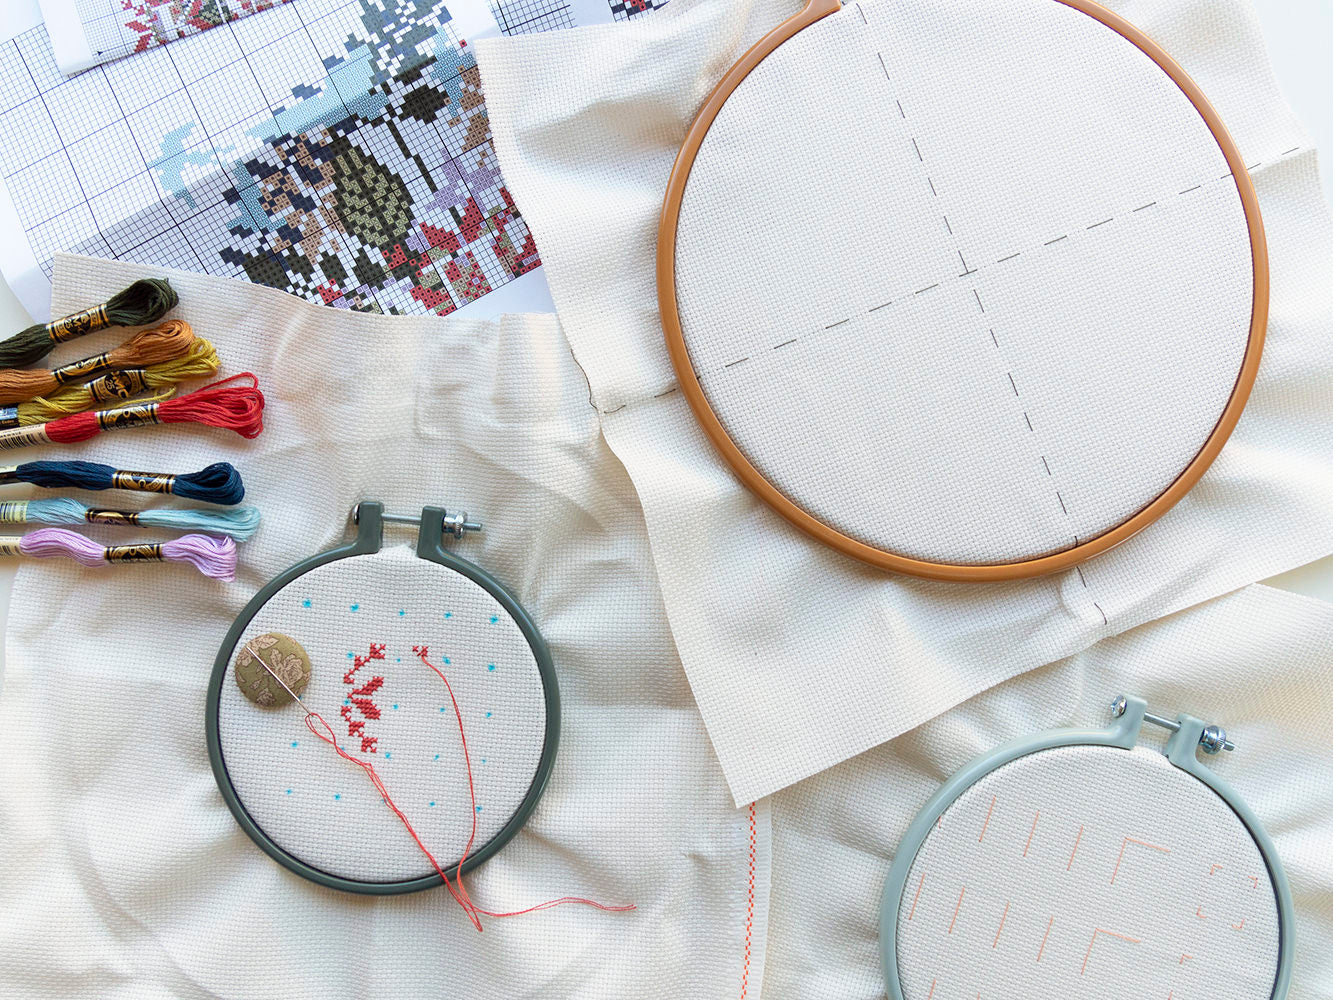
Essential Materials for Your Cross Stitch Kit
To start building your own cross stitch kit, gather the following materials:
- Fabric: Aida cloth is the most common choice, available in various counts (e.g., 14-count, 16-count).
- Embroidery Floss: Choose colors that appeal to you; DMC and Anchor are popular brands.
- Needles: Tapestry needles are ideal for cross stitching.
- Scissors: Small, sharp scissors are necessary for cutting threads.
- Hoop or Frame: This keeps your fabric taut while you work.
- Graph Paper or Software: For designing your pattern.
Designing Your Cross Stitch Pattern
Using Graph Paper
One traditional method for creating a cross stitch pattern is by using graph paper. Each square on the graph represents one stitch. Here’s how to do it:
- Sketch Your Design: Lightly outline your design on the graph paper using a pencil.
- Color Coding: Fill in the squares with colored pencils that match your chosen embroidery floss.
- Key Creation: Create a key that indicates which color corresponds to which symbol or square.
Digital Tools
For those who prefer digital design, software like Microsoft Excel or online tools such as Stitch Fiddle can be utilized:
- Microsoft Excel/Google Sheets: Use grid features to create patterns easily.
- Stitch Fiddle: This online tool allows you to create patterns from scratch or upload images to convert them into cross stitch designs.
Choosing Your Colors
Selecting the right colors is crucial for bringing your design to life:
- Color Theory Basics: Familiarize yourself with complementary and analogous colors to create visually appealing combinations.
- Shade Cards: Use shade cards from embroidery floss brands to help visualize color choices.
Gathering Supplies
Once your pattern is ready, it’s time to gather all necessary supplies:
- Fabric Size Calculation: Determine the size of fabric needed based on your pattern dimensions.
- Thread Requirements: Refer to your pattern key for the number of skeins required for each color.
Kitting Up Your Project
Kitting up involves organizing all materials needed for your project:
- Prepare Fabric: Cut the fabric according to the required dimensions, leaving extra space around the edges.
- Organize Threads: Sort and label each thread color based on your key; consider using thread organizers or bags.
Starting Your Cross Stitch Project
Finding the Center
Begin by locating the center of both your fabric and pattern:
- Fold the fabric in half both ways to find the center point.
- Mark it lightly with a pencil or fabric marker.
Securing Your Fabric in a Hoop
Place the fabric in an embroidery hoop or frame, ensuring it’s taut but not stretched excessively.
Threading Your Needle
To prepare for stitching:
- Cut a length of thread (about 18 inches).
- Separate strands if using multi-stranded floss (typically 6 strands).
- Thread your needle and tie a knot at one end.
Basic Cross Stitch Technique
Follow these steps for basic cross stitching:
- Start from the back of the fabric, bringing the needle up through the bottom left hole of your starting square.
- Go diagonally down into the top right hole, then back up through the top left hole and down into the bottom right hole.
- Repeat until you complete each section of your design.
Finishing Your Project
Once you’ve completed your stitching:
- Secure Threads: Tie off any loose threads at the back of your work.
- Pressing Your Work: Gently press with an iron on low heat (if applicable) to remove creases.
Displaying Your Finished Piece
There are several ways to showcase your completed cross stitch project:
- Framing: Use an appropriate frame that complements your design.
- Finishing Techniques: Consider mounting on canvas or making it into a pillow.
Troubleshooting Common Issues
During cross stitching, you may encounter some common issues:
- Tension Problems: Ensure that stitches are not too tight or loose by adjusting how you hold the fabric and thread.
- Mistakes in Stitching: If you make an error, carefully remove stitches using a seam ripper or tweezers.
Resources for Further Learning
To enhance your cross stitching skills further, consider exploring online tutorials, blogs, and community forums dedicated to needlework.
- Websites like Gathered provide valuable guides on creating patterns1.
- YouTube channels offer visual tutorials on various techniques35.
By following these steps and utilizing available resources, you can successfully build and complete your own cross stitch kit tailored specifically to your creative vision!